How to Use Flexible Silicone Glue for Best Results?
Flexible Silicone Glue is a versatile adhesive. It is used in various applications, from crafting to home repair. Its unique properties make it a favorite among DIY enthusiasts.
This glue remains flexible after curing, allowing it to bond different materials. It works on glass, ceramics, and metal. However, using it effectively can be a challenge. Proper preparation is key to avoid common mistakes. Surface cleanliness plays an essential role in ensuring a strong adhesion.
Additionally, conditions like humidity can affect its performance. Many users forget to consider this, leading to unsatisfactory results. Understanding the right methods will help in achieving the best outcomes. Experimenting with different techniques may reveal new possibilities as well. Working with Flexible Silicone Glue can be rewarding if approached thoughtfully.
Understanding Flexible Silicone Glue and Its Benefits
Flexible silicone glue is increasingly popular for various applications. This type of adhesive offers excellent bonding capabilities, especially for materials like glass, metal, and wood. A report from the Adhesive and Sealant Council highlights that silicone adhesives have a market growth rate of 5.2% annually within the construction sector. This trend stems from their versatility and ability to withstand extreme temperatures.
One key benefit of flexible silicone glue is its waterproof properties. This feature is crucial for outdoor applications or environments that experience high humidity. According to industry data, over 70% of users favor silicone adhesives for bathroom and kitchen projects due to their resistance to water damage. However, improper application can lead to unsatisfactory bonding. For instance, if surfaces are not cleaned adequately, the adhesive may not perform as expected, leading users to rethink their methods.
Moreover, flexible silicone glue remains elastic after curing. This elasticity allows it to endure movements and stresses without cracking. In a survey by the Institute of Adhesives, over 60% of professionals reported challenges with adhesion failure on dynamic surfaces. Users should take time to understand specific material properties and application techniques to ensure the best results.
How to Use Flexible Silicone Glue for Best Results?
| Application Area |
Preparation Steps |
Application Tips |
Curing Time |
Benefits |
| Bathroom Fixtures |
Clean the surface, ensuring it's free of moisture. |
Apply evenly; avoid excessive amounts. |
24 hours for full cure. |
Water-resistant, flexible seal. |
| Kitchen Repairs |
Remove old adhesive and clean surfaces. |
Use a caulking gun for a smooth line. |
24-48 hours for full adhesion. |
Heat resistant, durable bond. |
| Glass Projects |
Clean glass with alcohol to ensure clarity. |
Apply in a well-ventilated area. |
48 hours for complete curing. |
Clear finish, non-toxic. |
| Automotive Uses |
Clean surface areas for bond. |
Keep glue away from painted surfaces. |
1 hour to set, fully cure in 72 hours. |
Resistant to vibrations and water. |
Preparing Surfaces for Optimal Adhesion with Silicone Glue
When using flexible silicone glue, preparing surfaces for optimal adhesion is crucial. A clean surface ensures a strong bond. Dust, grease, or moisture can weaken adhesion. According to a report by Adhesives Magazine, nearly 30% of adhesive failures come from improper surface preparation. This highlights the importance of taking time to clean surfaces before application.
Begin by cleaning the area thoroughly. Use alcohol or soap and water to remove dirt and oils. Make sure the surface is dry before applying the glue. A rough surface can enhance grip. Lightly sanding the area may improve adhesion. This method works well on materials like plastic and metal. Just remember to remove any debris after sanding; even small particles can cause issues.
Tips: Always test on a small area first. This can prevent larger mistakes. If you find the glue isn’t adhering as expected, re-evaluate your cleaning technique. Even a tiny amount of residue can make a difference. Don’t rush the process; take your time for the best results. A good surface prep may mean the difference between a strong bond and a frustrating failure.
Adhesion Strength of Different Silicone Glue Types
Step-by-Step Application Process for Silicone Glue
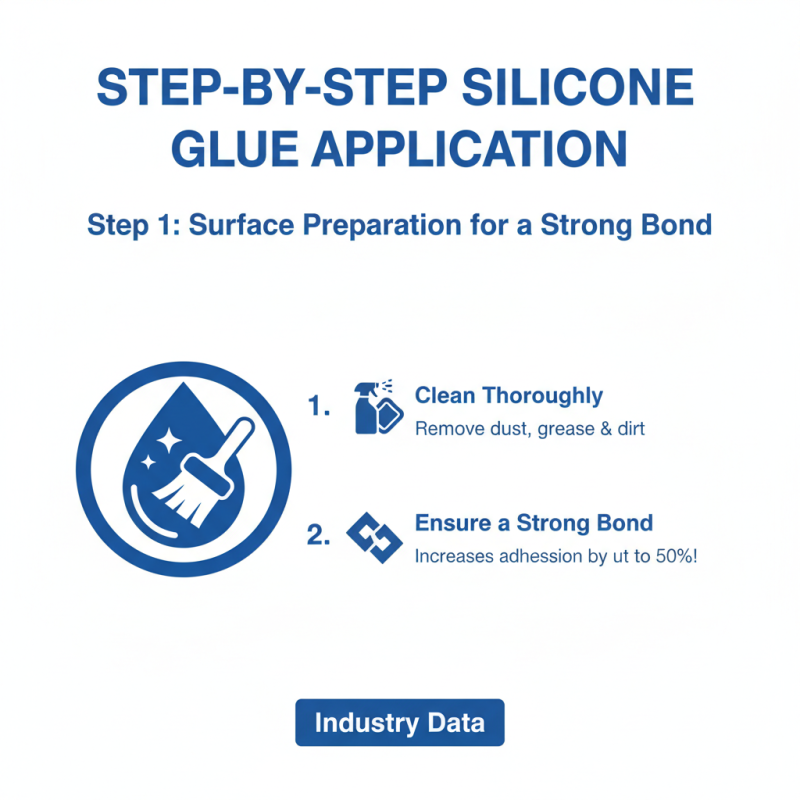
When using flexible silicone glue, following a precise application process is crucial. Start by preparing your surfaces. Clean the area thoroughly, removing dust and grease. This ensures a strong bond. These surface preparations can increase adhesion by up to 50%, according to industry data.
Next, apply the glue directly from the tube. Use a steady hand to create an even layer. If using a caulking gun, a slow, controlled squeeze is vital. Overapplying can lead to messy finishes. Consider this: excess glue might take longer to cure. It can also create unsightly blobs that detract from your project’s aesthetics.
After applying, press the materials together firmly. Hold them in place for several minutes. This step is key to achieving a permanent bond. However, the curing process can sometimes reveal small gaps. These imperfections may require a second application, which can be frustrating. Patience pays off in the end, as silicone glue can resist extreme temperatures and moisture once fully cured, boasting durability that lasts for years.
Curing and Drying Times for Maximum Effectiveness
When using flexible silicone glue, understanding
curing and drying times is key for optimal results.
Typically, silicone glue takes around 24 hours to cure fully. During this
time, it transitions from a tacky state to a waterproof bond. Ensure these hours are free
from stress or disturbance. A noisy environment can lead to misalignment and imperfect adhesion.
Drying time can vary. In humid conditions, the silicone may take longer to set.
Conversely, in dry climates, it might seem quicker than expected. Be cautious; rushing can
lead to bubbles or weak spots in the adhesive. Check often, but resist the urge to touch.
A premature inspection can compromise the bond.
If things don’t go as planned, reflect on what went wrong. Was the surface clean and dry?
Did you apply an even coat? Even after mastering these details, mistakes can happen. Embrace
the learning process. Each project gives insight into improving future applications.
Tips for Maintenance and Long-lasting Results with Silicone Glue
When using flexible silicone glue, proper maintenance is key to achieving long-lasting results. After application, allow the glue to cure fully. This can take up to 24 hours. Avoid touching or stressing the bond during this time. If you rush this, the adhesion may weaken.
Besides curing, keep the bonded area clean. Dirt and moisture can compromise the seal. Regularly check for wear or damage. If you notice any peeling or cracks, repair them promptly. Small issues can escalate quickly. Use a gentle cleaner to maintain the area's integrity, but avoid harsh chemicals.
Storage is also important. Keep your silicone glue in a cool, dry place. Check for expiration dates. Old glue may not bond effectively. These minor actions can prolong the life of your projects. Pay attention to these details for better, reliable performance. Remember, even small mistakes can lead to unsatisfactory outcomes.